Download Innjoo Stock ROM

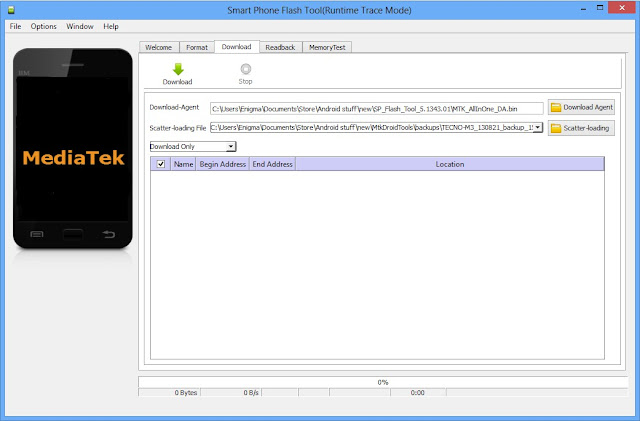
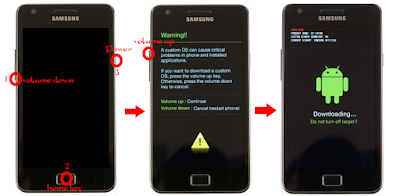
Download Innjoo Stock ROM To download and learn how to use SP Flash Tools to unbrick your phone, click here To download and learn how to create Scatter file and ROM Backup using MTK Droid Tools click here Innjoo i1 Innjoo i1k Innjoo i1s Innjoo i2 Innjoo i2s Innjoo Fire Innjoo Fire Pro Innjoo Fire+ LTE Innjoo Fire+ 3G Injoo Fire 3D HD Innjoo Halo Innjoo One 3G HD OS5.1 Innjoo One 3G HD OS4.4 Innjoo One LTE HD Innjoo Note Innjoo Note E Innjoo Note Pro